
This guide simplifies complex concepts, ensuring easy comprehension of your new ASUS Z97-A․ It offers assistance, maximizing performance and a successful experience with this motherboard․
Overview and Key Features
The ASUS Z97-A motherboard is designed to unlock the full potential of your Intel Core processor, offering a robust platform for gaming, content creation, and everyday computing․ This board prioritizes ease of use, breaking down complex configurations into manageable steps․ Key features include support for 4th Generation Intel Core i7/i5/i3 processors, and DDR4 memory for enhanced performance and responsiveness․
It boasts a comprehensive connectivity suite, including USB 3․0 and SATA 6Gb/s ports, ensuring rapid data transfer speeds․ The Z97 chipset enables flexible system configurations, including multi-GPU setups with NVIDIA SLI and AMD CrossFireX․ ASUS’s commitment to quality is evident in the durable construction and advanced cooling solutions, guaranteeing stability even under heavy loads․ Customer support resources are readily available should assistance be needed during setup or operation․
System Requirements and Package Contents
Before installing the ASUS Z97-A, ensure your system meets the following requirements: a 4th Generation Intel Core i7/i5/i3 processor, DDR4 memory modules (compatibility list available on the ASUS website), a power supply unit (PSU) with sufficient wattage for your components, and a compatible operating system – Windows 8․1/10/11 are recommended․ A case that supports ATX form factor is also necessary․
The package contents include the ASUS Z97-A motherboard itself, an I/O panel shield, a SATA 6Gb/s cable(s), an ASUS Wi-Fi antenna (if applicable), a user manual, and supporting screws for installation․ Verify all components are present and undamaged upon unboxing․ Additional items, such as SLI bridge connectors, may be included depending on the specific bundle․ Refer to the included documentation for a complete inventory․
Preparing for Installation
Carefully unpack and inspect the motherboard and all included accessories, ensuring no damage occurred during shipping for a smooth setup process․
Unboxing and Inspection
Upon receiving your ASUS Z97-A motherboard, carefully open the packaging and gently remove the anti-static bag protecting the board․ Visually inspect the motherboard for any physical damage, such as bent pins, cracked components, or loose parts․ Pay close attention to the CPU socket, RAM slots, and expansion slots․
Verify the package contents against the included documentation to ensure all expected items are present․ These typically include the I/O shield, SATA cables, user manual, and potentially any bundled accessories․ If any components are missing or damaged, immediately contact your retailer or ASUS customer support․
Handle the motherboard with care, avoiding touching the components directly․ Static electricity can damage sensitive electronic parts․ Ground yourself by touching a metal object before handling the board․ A properly conducted unboxing and inspection are crucial for a successful build and preventing potential issues later on․
CPU Compatibility and Installation
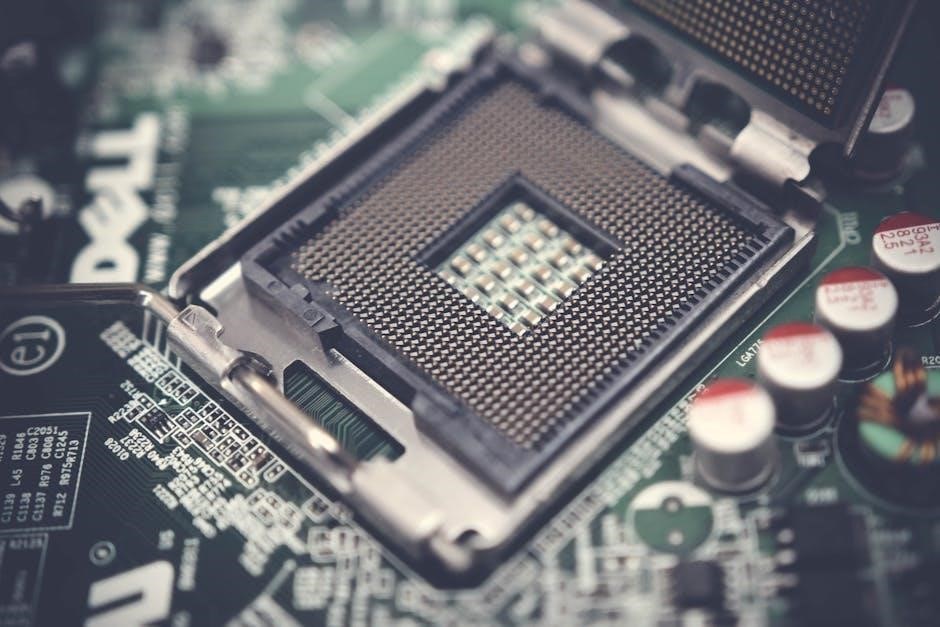
The ASUS Z97-A motherboard supports Intel® Core™ i7/i5/i3 processors in the LGA1150 package․ Before installation, confirm your CPU is compatible with the board’s supported CPU list, available on the ASUS website․ Carefully open the CPU socket lever, aligning the CPU with the socket’s orientation markers – typically a golden triangle on both the CPU and socket․
Gently place the CPU into the socket, ensuring it sits flush without forcing it․ Do not bend the pins! Close the socket lever, securing the CPU in place․ Proper alignment and gentle handling are crucial to prevent damage․ Apply thermal paste to the CPU’s integrated heat spreader (IHS) before installing the CPU cooler․
Ensure the cooler is securely mounted, providing adequate pressure for optimal heat transfer․ Incorrect CPU installation can lead to system instability or permanent damage․ Refer to the CPU cooler’s manual for specific installation instructions․
Memory (RAM) Installation and Configuration
The ASUS Z97-A motherboard supports DDR4 memory, offering enhanced performance․ Before installing RAM, ensure your system is powered off and disconnected from the power source․ Locate the DIMM slots on the motherboard; typically, they are color-coded for dual-channel configuration․ Consult the motherboard manual to identify the correct slots for optimal performance․
Open the retaining clips on both ends of the DIMM slots․ Align the notch on the RAM module with the notch in the slot, and press down firmly on both ends until the clips click into place․ Ensure the RAM is securely seated․ For dual-channel operation, install identical RAM modules in the designated slots․
Access the BIOS to verify the RAM is detected and configured correctly․ You may need to enable XMP (Extreme Memory Profile) to achieve the advertised RAM speeds․ Incorrect RAM installation or configuration can cause system instability or failure to boot․

Connecting Peripherals and Components
Proper connection of devices is crucial for system functionality․ This section details front panel connectors, SATA ports, and expansion slots for seamless integration․
Front Panel Connector Guide
Connecting the front panel connectors requires careful attention to ensure proper functionality of your system’s power button, reset button, HDD LED, and power LED․ Refer to the ASUS Z97-A motherboard manual for a detailed diagram illustrating the pin assignments․ Incorrect connections can prevent the system from powering on or displaying incorrect status indicators․
Typically, these connectors are located at the bottom-right corner of the motherboard․ The manual clearly labels each pin, including positive and negative designations for the LEDs․ Double-check polarity before connecting to avoid damage․ Pay close attention to the Power SW, Reset SW, Power LED, and HDD LED connections․ A misaligned connection can lead to frustrating troubleshooting later on․ Ensure a secure fit for each connector to prevent accidental disconnections during operation․
SATA and Storage Device Connections
The ASUS Z97-A motherboard provides multiple SATA 6Gb/s ports for connecting storage devices like hard disk drives (HDDs) and solid-state drives (SSDs)․ Consult the motherboard manual to identify the SATA ports and their corresponding locations․ The manual details which ports might share bandwidth with other components, impacting performance if multiple high-speed devices are connected simultaneously․
Ensure proper cable management to avoid obstructing airflow․ Connect the SATA data cables securely to both the motherboard and the storage devices․ For optimal performance, consider using SATA 6Gb/s cables․ The manual may also specify which ports support RAID configurations, allowing for data redundancy or increased speed․ Remember to configure the SATA mode (AHCI, IDE, or RAID) in the BIOS for proper device recognition and functionality․ Verify all connections before powering on the system․
Expansion Slot Configuration (PCIe)
The ASUS Z97-A motherboard features several PCIe (Peripheral Component Interconnect Express) slots for expanding system capabilities․ These slots accommodate graphics cards, sound cards, network cards, and other expansion cards․ Refer to the motherboard manual to identify the different PCIe slot types (e․g․, PCIe 3․0 x16, PCIe 2․0 x1) and their corresponding bandwidths․
The manual will detail which slots operate at full speed when multiple cards are installed, as bandwidth sharing may occur․ Ensure that expansion cards are securely seated in the PCIe slots․ Proper installation requires aligning the card’s connector with the slot and pressing down firmly until it clicks into place․ Consider the physical size of the expansion card and ensure it doesn’t obstruct other components or airflow․ Consult the manual for optimal slot configurations based on your specific hardware setup․

BIOS Setup and Configuration

Accessing the BIOS allows customization of hardware settings․ Navigation is key to optimizing performance and stability, enabling adjustments for a tailored computing experience․
Accessing the BIOS
To enter the BIOS setup utility on your ASUS Z97-A motherboard, you’ll need to press a specific key during the initial startup sequence․ Typically, this key is Delete (Del), but it can also be F2, depending on your system configuration․ Watch closely for a message on the screen during the Power-On Self-Test (POST) process; it will indicate the correct key to press – usually displayed briefly as “Press DEL to enter SETUP”․
Begin pressing the designated key repeatedly as soon as you power on the computer․ Don’t hold the key down, but rather tap it consistently․ If the system boots into the operating system, you’ve missed the timing and will need to restart the computer and try again․ Ensure no USB keyboards are interfering with the process, and if you are using a USB keyboard, try a PS/2 keyboard if available․ Successful entry will lead you to the ASUS UEFI BIOS interface, where you can configure various system settings․
BIOS Overview and Navigation
The ASUS Z97-A utilizes a UEFI (Unified Extensible Firmware Interface) BIOS, offering a graphical, mouse-compatible interface․ Upon entering, you’ll find several main sections typically located across the top: Main, Advanced, Tools, and Exit․ The Main section displays system information․ Advanced contains detailed configuration options for CPU, chipset, SATA, and onboard devices․
Tools offer features like ASUS EZ Flash for BIOS updates and system diagnostics․ Navigation is primarily done using the mouse, but you can also use the arrow keys to highlight options and Enter to select․ Use the Esc key to return to the previous menu․ Pay attention to help text available on most screens, providing explanations for each setting․ Saving changes is crucial; use the Exit menu to save and exit, or discard changes․
Overclocking Basics (CPU & RAM)
Overclocking allows increasing CPU and RAM speeds beyond factory settings for enhanced performance, but requires caution․ Within the BIOS Advanced menu, locate CPU configuration․ Adjust the CPU multiplier incrementally, monitoring system stability after each change․ Increase CPU voltage slightly if needed, but avoid excessive voltage to prevent damage․
For RAM overclocking, adjust the DRAM frequency and timings․ The XMP (Extreme Memory Profile) option, if available, automatically applies optimized settings․ Monitor temperatures closely using monitoring software․ Stability testing with programs like Prime95 or Memtest86+ is vital to ensure a reliable overclock․ Always prioritize stability over maximum achievable speeds, and document all changes․

Troubleshooting Common Issues
Addressing boot failures and error codes is crucial․ Connectivity problems with USB devices can often be resolved by checking connections and driver installations․
Boot Issues and Error Codes
Encountering boot problems with your ASUS Z97-A? Several factors can contribute to this․ First, meticulously verify all power connections to the motherboard, CPU, and storage devices․ A loose connection is a frequent culprit․ Next, inspect RAM modules; ensure they are firmly seated in their slots and compatible with the motherboard’s specifications․
Error codes displayed during startup provide valuable diagnostic clues․ Consult the ASUS Z97-A manual for a comprehensive list of error code definitions․ These codes pinpoint the source of the issue, whether it’s a CPU failure, memory error, or graphics card problem․ If the system fails to POST (Power-On Self-Test), a beep code sequence may indicate the failing component․
Clearing the CMOS can resolve boot issues caused by incorrect BIOS settings․ Locate the CMOS battery on the motherboard and temporarily remove it, or use the dedicated Clear CMOS jumper․ Remember to restore default BIOS settings after clearing CMOS․
USB and Peripheral Connectivity Problems
Experiencing issues with USB ports or peripheral devices on your ASUS Z97-A? Begin by ensuring the devices are properly connected and powered on․ Try different USB ports – some may offer varying power outputs or functionalities․ Check Device Manager in your operating system for any driver conflicts or unrecognized devices․
Outdated or corrupted USB drivers are common causes of connectivity problems․ Visit the ASUS support website and download the latest USB drivers specifically for your Z97-A motherboard and operating system․ Reinstalling these drivers can often resolve the issue․
BIOS settings can also affect USB functionality․ Access the BIOS and verify that USB ports are enabled and configured correctly․ Experiment with different USB controller modes (e․g․, USB 3․0, USB 2․0) to see if compatibility improves․ If problems persist, consider a CMOS reset to restore default BIOS settings․
Driver Installation and Software
To unlock the full potential of your ASUS Z97-A motherboard, installing the latest drivers and software is crucial․ Begin by visiting the official ASUS support website and navigating to the Z97-A product page․ Download the driver package compatible with your specific operating system (Windows 7, 8, 10, or 11)․
The driver package typically includes drivers for the chipset, audio, LAN, USB, and other onboard devices․ Install the chipset drivers first, followed by the others in any order․ ASUS also provides utility software like AI Suite, offering system monitoring, fan control, and overclocking features․
During installation, follow the on-screen instructions carefully․ Restart your computer after each driver installation to ensure proper functionality․ Regularly check for driver updates on the ASUS website to maintain optimal performance and compatibility with new hardware and software․